安装方式有两种:
- 使用epel-testing 源
- 手动编译安装
我的选择
epel-testing 源还是得慎重点,反正这东西安装之后估计永远也不会更新,除非我有新想法了, 于是我选择编译安装。
下载最新版本
# 截至 2019/12/07, 最新版1.11, 更新时间:2019/6/29
wget https://github.com/beanstalkd/beanstalkd/archive/v1.11.zip
unzip v1.11.zip
cd beanstalkd-1.11/
wget https://github.com/beanstalkd/beanstalkd/archive/v1.11.zip
unzip v1.11.zip
cd beanstalkd-1.11/
编译
虽然用了CentOS8,但是yum还是继续用吧,估计dnf还得熟悉一段时间。
# 安装编译支持
yum install make gcc
# 编译
make && make install
yum install make gcc
# 编译
make && make install
cc -Wall -Werror -Wformat=2 -g -c -o linux.o linux.c
cc -Wall -Werror -Wformat=2 -g -c -o conn.o conn.c
cc -Wall -Werror -Wformat=2 -g -c -o file.o file.c
cc -Wall -Werror -Wformat=2 -g -c -o heap.o heap.c
cc -Wall -Werror -Wformat=2 -g -c -o job.o job.c
cc -Wall -Werror -Wformat=2 -g -c -o ms.o ms.c
cc -Wall -Werror -Wformat=2 -g -c -o net.o net.c
cc -Wall -Werror -Wformat=2 -g -c -o primes.o primes.c
cc -Wall -Werror -Wformat=2 -g -c -o prot.o prot.c
cc -Wall -Werror -Wformat=2 -g -c -o sd-daemon.o sd-daemon.c
cc -Wall -Werror -Wformat=2 -g -c -o serv.o serv.c
cc -Wall -Werror -Wformat=2 -g -c -o time.o time.c
cc -Wall -Werror -Wformat=2 -g -c -o tube.o tube.c
cc -Wall -Werror -Wformat=2 -g -c -o util.o util.c
./verc.sh >vers.c
cc -Wall -Werror -Wformat=2 -g -c -o vers.o vers.c
cc -Wall -Werror -Wformat=2 -g -c -o walg.o walg.c
cc -Wall -Werror -Wformat=2 -g -c -o main.o main.c
cc -o beanstalkd linux.o conn.o file.o heap.o job.o ms.o net.o primes.o prot.o sd-daemon.o serv.o time.o tube.o util.o vers.o walg.o main.o -lrt
install -d /usr/local/bin/
install beanstalkd /usr/local/bin/beanstalkd
测试
不测试功能了,看看版本是否正确就好
# beanstalkd -v
beanstalkd 1.11
beanstalkd 1.11
开机自启
准备数据文件夹
mkdir /var/lib/beanstalkd
写入文件 /etc/systemd/system/beanstalkd.service
[Unit]
Description=Beanstalkd is a simple, fast work queue
[Service]
User=root
ExecStart=/usr/local/bin/beanstalkd -l 127.0.0.1 -b /var/lib/beanstalkd
[Install]
WantedBy=multi-user.target
Description=Beanstalkd is a simple, fast work queue
[Service]
User=root
ExecStart=/usr/local/bin/beanstalkd -l 127.0.0.1 -b /var/lib/beanstalkd
[Install]
WantedBy=multi-user.target
启动脚本
[root@jp03 ~]# vim /etc/systemd/system/beanstalkd.service
[root@jp03 ~]# systemctl daemon-reload
[root@jp03 ~]# systemctl start beanstalkd.service
[root@jp03 ~]# systemctl enable beanstalkd.service
Created symlink /etc/systemd/system/multi-user.target.wants/beanstalkd.service → /etc/systemd/system/beanstalkd.service.
[root@jp03 ~]# systemctl status beanstalkd.service
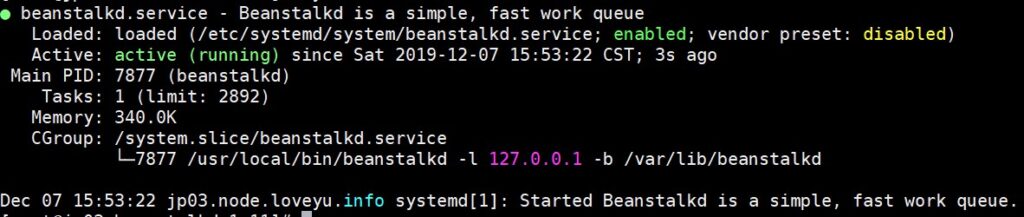
● beanstalkd.service - Beanstalkd is a simple, fast work queue
Loaded: loaded (/etc/systemd/system/beanstalkd.service; enabled; vendor preset: disabled)
Active: active (running) since Sat 2019-12-07 15:53:22 CST; 3s ago
Main PID: 7877 (beanstalkd)
Tasks: 1 (limit: 2892)
Memory: 340.0K
CGroup: /system.slice/beanstalkd.service
└─7877 /usr/local/bin/beanstalkd -l 127.0.0.1 -b /var/lib/beanstalkd
Dec 07 15:53:22 jp03.node.loveyu.info systemd[1]: Started Beanstalkd is a simple, fast work queue.
[root@jp03 ~]# systemctl daemon-reload
[root@jp03 ~]# systemctl start beanstalkd.service
[root@jp03 ~]# systemctl enable beanstalkd.service
Created symlink /etc/systemd/system/multi-user.target.wants/beanstalkd.service → /etc/systemd/system/beanstalkd.service.
[root@jp03 ~]# systemctl status beanstalkd.service
● beanstalkd.service - Beanstalkd is a simple, fast work queue
Loaded: loaded (/etc/systemd/system/beanstalkd.service; enabled; vendor preset: disabled)
Active: active (running) since Sat 2019-12-07 15:53:22 CST; 3s ago
Main PID: 7877 (beanstalkd)
Tasks: 1 (limit: 2892)
Memory: 340.0K
CGroup: /system.slice/beanstalkd.service
└─7877 /usr/local/bin/beanstalkd -l 127.0.0.1 -b /var/lib/beanstalkd
Dec 07 15:53:22 jp03.node.loveyu.info systemd[1]: Started Beanstalkd is a simple, fast work queue.
网站内容还是挺不错的,谢谢博主。还有博客应该是WORDPRESS做的吧,感觉美观度还可以提高,谢谢。我自已是搞前端设计的,你的代码可以做精简一点。
6年前手写的模板不做优化,只考虑重写